At the dawn of the twenty-first century, combining the visual and the literary (“a picture is worth a thousand words”) has been expanded and enhanced by diverse technological advancements, such as computer assisted instruction, video games virtual reality facilities, and MTV.
Concepts and Skills in Learning
How does combining the senses—visual and aural—assist in developing critical listening skills in music? The word skills, rather than concepts is used here purposefully Conceptual or fact-based knowledge can be learned and parroted back. Knowing what a musical pattern is—what it is called, how it works in a piece of music—is a concept. We know it or know about it (For example, the blues is based on a 12-bar (measure) chord progression.) In contrast, musical skills, usually refers to something a person can do, such as playing a musica instrument well, or perfecting a beautiful singing voice. But also of vital importance are skills in listening: recognizing and identifying musical patterns as we hear them These skills are vital for musicians but are also important for the average listener to increase the enjoyment of a musical experience. Incorporating listening skill-building components into music listening courses for the nonmusician has become increasingly important in school curricula.
The Eye can Help the Ear
The eye can help the ear to learn better, and twenty-first century technology gives us more tools to link the two senses. By pairing a visual event with an audio event, the sense of sight can be used to cue the ear by association. Developing listening skills is a complicated procedure requiring that a knowledge (cognitive) of musical concepts and terminology will be immediately recognized (triggered) through an auditory response. For example, when a student is listening to a musical excerpt, it can be structured so that a graphic image changes at precisely the moment in the music where we want the student to notice a significant sound change. This technique can be used for an initial presentation of musical materials so students’ ears are cued by sight from the very first hearing. This methodology is also effective for producing exercises that may be played over and over to help students drill until recognition comes easily. Similar audio drill packages have been used for years via audiotape and computers to teach ear training skills to music students.
Developing M ultimedia Tools to Teach Listening Skills
Helping the nonmusician to develop skills to recognize musical forms by ear can be a daunting task. Combing a tried and true method developed by Hungarian composer and pedagogue Zoltan Kodâly with current audio/video computer technology can make this easier. Kodâly believed that the ability to read and reproduce musical notation (musical literacy) could become as universal as language literacy. His approach involves teaching children through their own folk and children’s songs. Whatever the culture or society, children are closely connected to their own songs. By systematically introducing the musical elements (pitches, intervals, rhythms) through songs the children know by heart, it is possible to teach these elements as separate skills. Today’s young people have an amazing familiarity with popular music from the past 50 years. By using a combination of video and graphics together with a familiar popular song, we can take advantage of a student’s informal knowing a song by heart and build on this to develop the formal skills necessary to recognize these same musical elements in unfamiliar pieces.
Computer speed and storage capacity now easily permit audio, video, and graphics to be integrated into presentations programs such as PowerPoint; graphic images can be produced with software such as Adobe Creative Suite; and media software such as iMovie and Final Cut Express 2 make possible manipulation of all of these. Following is an example of how such a presentation was created to help students in a general music listening class develop skills to aurally recognize ternary form used in pop music.
Learning to Aurally Recognize 32-Bar Pop Form
Ternary form (ABA) is a common structure used in popular music, jazz, musicals, and in western European art music. Listeners of all ages have heard songs in this form. In popular music, the first section (A) is almost always repeated so that the structure is actually AABA. (“As Time Goes By” from Casablanca, Buddy Holly’s “Maybe Baby,” and “Tequila” are all in this form.)
The typical number of measures (bars) in each of these four sections is eight, making the whole format 32 bars long. In songs from tin-pan alley to Broadway and film musicals, to pop and rock, this AABA format is so widespread it has become known as 32-bar pop form.
The 32-bar pop form is an excellent example of a musical term that can be tested as either a concept or a skill. As a concept, students might be asked on an objective, multiple-choice exam to identify the typical ternary form used in popular songs and to select the correct answer from several choices, one of which is 32-bar pop. This information could be learned by reading about it, hearing it in a lecture, or from some other source. As a skill, students would be asked to listen to several songs and identify which excerpt is 32-bar pop only through listening (by ear).
Developing a Multimedia Presentation for 32-Bar Pop
How can we help students learn to recognize this musical form aurally? This aural skill could certainly be acquired though rote learning of a single song, but the ability to apply it to unfamiliar material would require some sort of connection between the cognitive and aural sense. This is where today’s new technology can help immensely. The process of creating a presentation involves several steps: (1) finding a song that is typical of the formal structure we are trying to teach; (2) developing a clear graphic representation of that structure; and (3) combining them in real time so the final product shows the student where the sounds change. An early Lennon/McCartney song, “From Me to You,” filmed at the Royal Variety Performance on November 34, 1963 is a perfect, textbook example of 32-bar pop structure. This example is especially engaging to students because it shows early film footage of a live performance by the Beatles.
1 It is assumed that the reader has some experience with basic audio and film editing techniques, so the description of the following project focuses on combining an audio/ video recording with changing graphics.
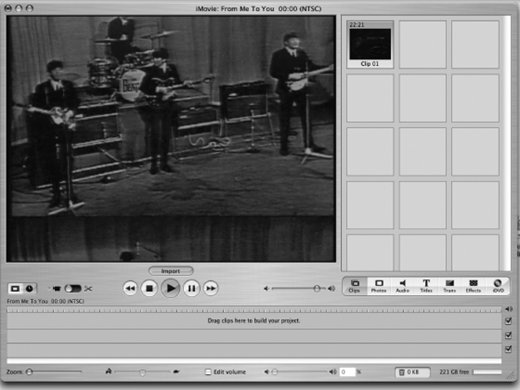
The film clip (don’t forget to license the film first!) is recorded and edited with iMovie so only the first four bars of the introduction and 32 bars of the first verse are used (see Figure 1).
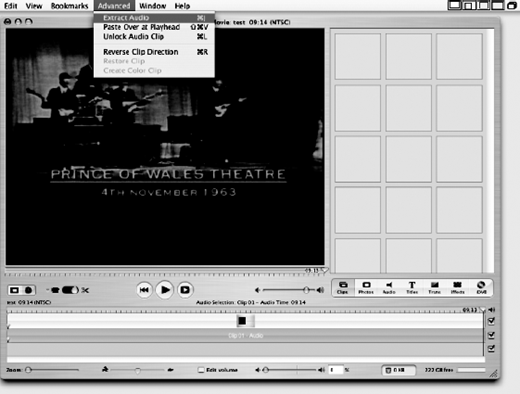
After editing the movie, use the “extract audio” feature (see Figure 2) in the advanced menu to create a separate audio track. This will result in better sound quality in the final presentation, and will allow exporting audio and video tracks separately. This is necessary in Final Cut Express 2. Save (share) the project as QuickTime, full-quality DV.
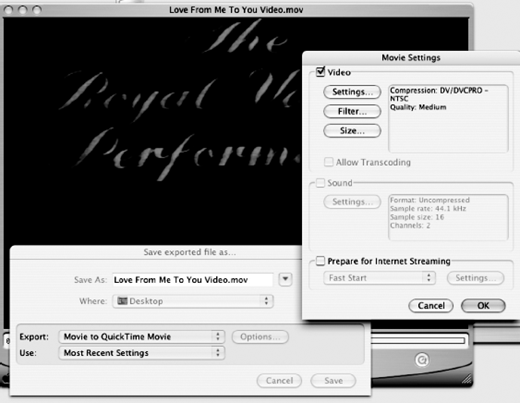
Using the “options” button from the export menu, export the QuickTime movie twice; once as a video file and once as an audio file (see Figure 3)
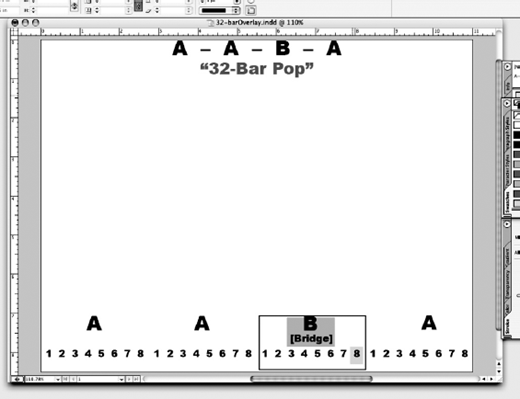
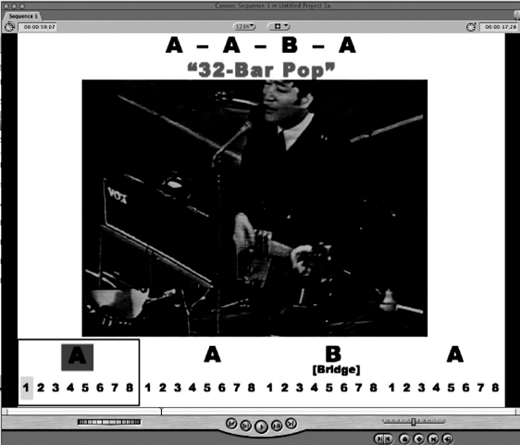
2 Create a graph of 32-bar pop format showing the larger sections (AABA) in one line, and the individual measures (bars) on another in Adobe InDesign. There will be 33 individual slides for the presentation; one graph for the introduction, plus 32—one for each bar of the verse itself. These pages must be saved as a high quality JPEG so they can be imported into Final Cut Express 2 on a video track. The introduction page is used only once, but the basic 32-bar template will be altered and saved 32 times. Each bar (1-32) of the song is highlighted as well as the sections (AABA) on a separate slide. Note the space in the center that will be used to show the video performance of the song (see Figure 4).
After creating the two QuickTime movie files (audio-video) of the song and 33 JPEG slides of the individually highlighted song-form graphics, we are ready to assemble the project in Final Cut Express 2.
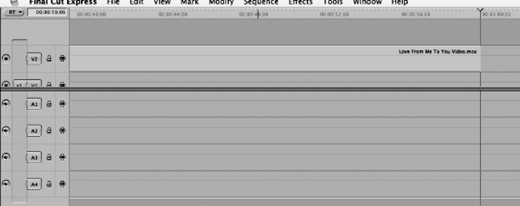
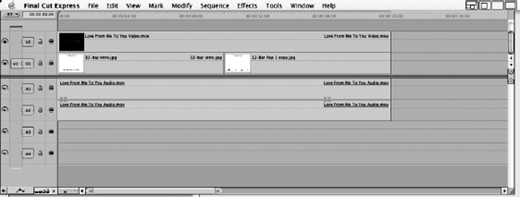
Create a new project in Final Cut Express 2 and drag the QuickTime video file onto the sequence page in the v2 track (see Figure 5).
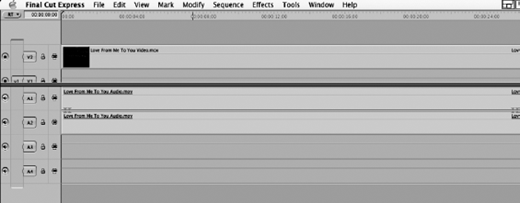
Now drag the QuickTime audio file to the a1 and a2 tracks (see Figure 6).
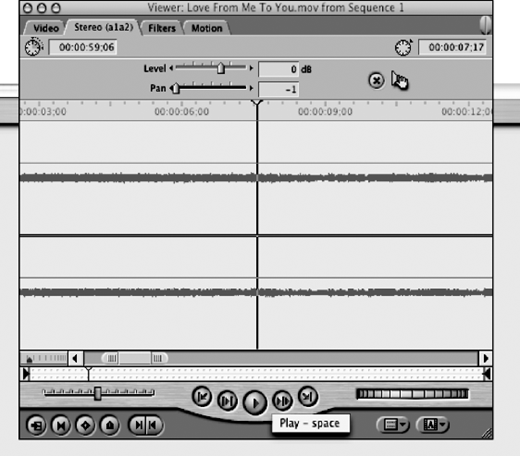
The empty v1 track will now be available for the song-form graphics. Double click on the audio tracks to bring up the audio screen. There is an accurate timer (in milliseconds) in the upper right that will allow you to make an accurate count of the real-time length for each bar of the song (see figure 7).
Now drag each of the song-form graphics slides, in order, onto the v1 track, remembering to return the time-line cursor to 00:00 each time before dragging the next slide (see Figure 8).
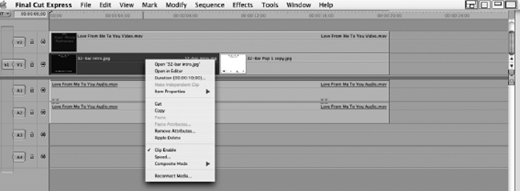
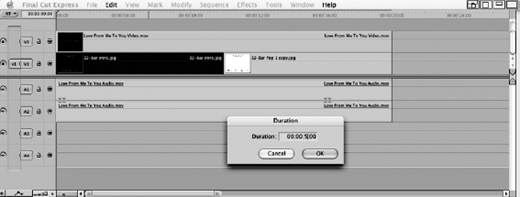
Right click (control click) on each of the slides in v1 to access duration (see Figure 9).
Adjust the duration of each of the slides to correspond to the real-time duration of each bar of the song (see Figure 10).
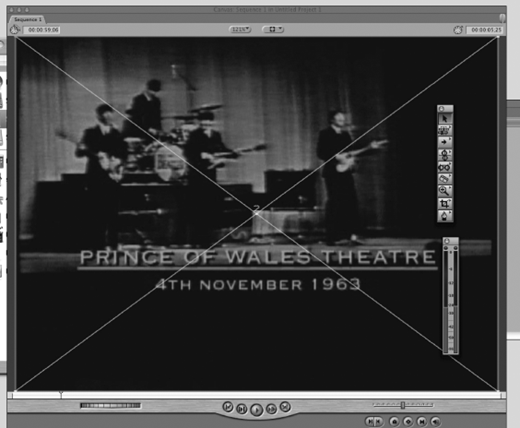
Double-click on v2 to get the screen in Figure 11.
Adjust the size of the image with the cursor by dragging corner arrows so it fits in the center of the screen, leaving sufficient space for the upper and lower graphics of v1 (see Figure 12).
As you play the completed movie with graphics, you may have to preview it a number of times to adjust the durations of the individual graphic slides in v1 so that the highlights change precisely at the beginning of each bar. (In “From Me to You,” for example, the introduction slide was 6:09 seconds, and each of the 32-bar slides was approximately 1:20 seconds.)
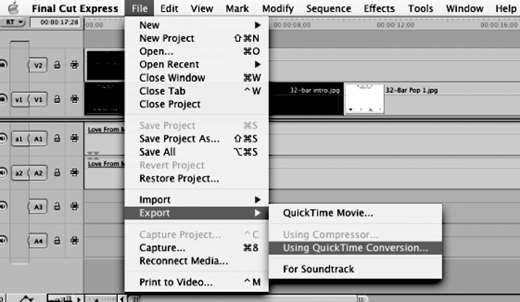
Once all the timing adjustments have been made, export the file using QuickTime conversion (see Figure 13).
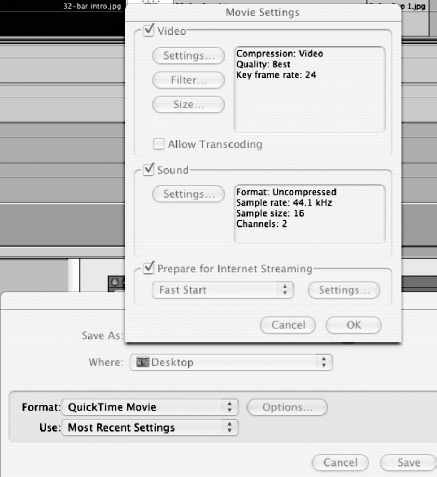
Using the options and then settings buttons, adjust the video to best quality and key frame rate to 24; and the audio to uncompressed, 44.1 kHz, sample size 16, and 2 channel (see Figure 14).
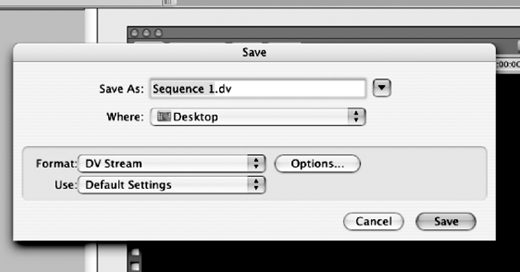
Save the project as DV stream (see Figure 15).
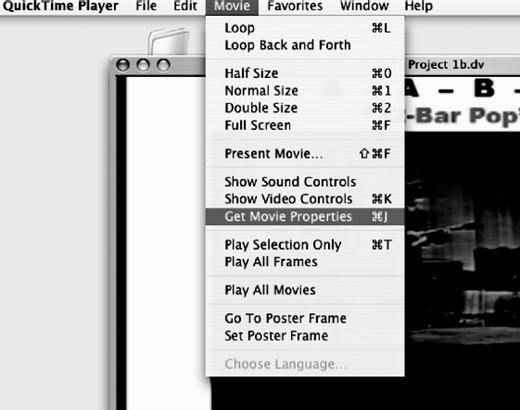
One final step: open the QuickTime DV you have saved. It will open in QuickTime; under th movie menu, select get movie prop erties (see Figure 16).
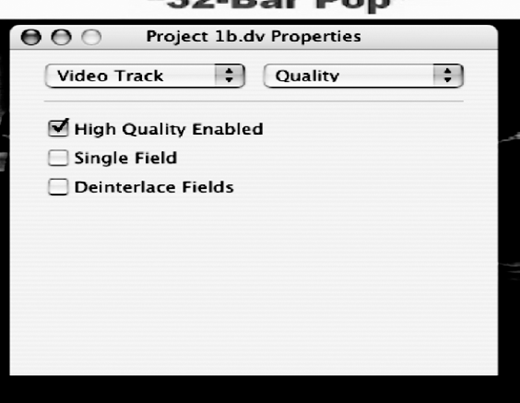
Select video track from the left menu and quality from the right menu, then check the high quality enabled box (see Figure 17).
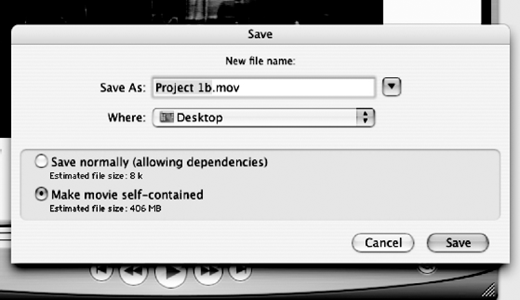
Save the project by checking the “make movie self-contained” box (see Figure 18).
Once saved, the video project is now ready to be used as a standalone movie viewed through a computer or converted into a DVD. It can also be incorporated in presentation software such as PowerPoint. As either a stand alone for students to use as drill material, or incorporated in a presentation, it will help students learn to hear a common music structure by using visuals (the eye) to trigger a response to an audio event.
“The eye can help the ear to learn better, and twenty-first century technology gives us more tools to link the two senses ... the sense of sight can be used to cue the ear by association.”
About the author